Add a Meetings & Events Item
Before creating a new event, check to see if there are any unpublished events that you can re-use. To check if there are unpublished events:
- Click on the small 'Content' link on top toolbar.
- Change the search 'type' to be 'Calendar Event'.
- Use the 'search by title' with keywords to try and find any existing content.
(e.g. - Board of commissioner meetings are saved by month. Before publishing, you just need to locate the correct month, then update the dates and title of the event.) - If there is no existing content, go ahead and add a new event.
Steps
- Hover over the small 'Content' menu (top menu), hover over 'add content', click on 'Calendar Event'.
- Complete the following fields under the 'General' tab:
- Name - Enter the title of the event.
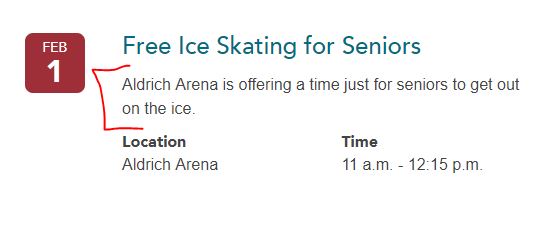
- Details- This is the text that will appear on an events callout. This shouldn't be longer than one (maybe two) sentence(s). Do not link any text in the excerpt, even if the same text is linked in the article. Example:
- Full Description - Add any information, including the information in the 'details' section. Do not include days or times.
- Contact Information - Add a phone number and/or email address.
- Choose the correct tags in the 'Tags' tab:
- Content Type Facet - Leave as 'Events'.
- Event Type - Choose the type of event.
- Ages - Choose the age of the event.
- Department - Choose the department associated with the event. You can choose multiple departments by holding down the 'shift' key.
- 'Location' tab:
- Building of Facility - If the event is hosted at a Ramsey County Building or Facility, choose that building/facility with the dropdown menu.
- Room, Suite or Area - Add this information if applicable.
- Location name - Only enter in a location here if nothing was chosen above (it's not an official Ramsey County location).
- Location - Enter the address in here, if you entered something for 'Location name'.
- Directions Link > Title - Enter 'Get directions'
- Directions Link > URL - Paste in the google directions 'share' link. Example link: https://goo.gl/maps/mG8CHTi25uD2
- Getting there - Enter in any helpful information on getting to this location, including:
- Bus routes.
- Parking.
- Road closures.
- 'Date and Time' tab:
- Date - Enter the date and time of the event (first session if there is more than one day).
- Expiration date - f this calendar event item is added to an event call out, this date will control when it will expire from the call out widget. If no expiration date is explicitly set, the start date of the event will be used instead.
- Time - Use AP Style (e.g. 1 - 3 p.m., 11 a.m. - 1 p.m., etc).
You can add multiple date instances, as well as multiple time instances within the same date.
- 'Links' tab:
- Link to Details - Add in a link to details on the event.
- Register Link > Title - If registration is an option, use "Register now".
- Register Link > URL - Provide the URL where a user goes to register for the event.
- Upload any images in the 'Media' tab:
- Image - Sized 468 x 336, web-resolution.
- Image thumbnail - Sized 300 x 300, web-resolution.
- All other menu selections can remain the default. Click 'Save' in the lower left corner of the menu.
To edit the event item, click on the 'Edit' button on the secondary toolbar:

After the event is reviewed and approved, publish the article by clicking the 'Publish' button:
Related articles
- Place a Calendar Event in an event listing. <add link when guide is ready>